How to Install Solar Panels on a Rooftop

When anchoring solar panels onto your rooftop, installers have two main objectives.
First is to ensure that all the panels are safely and securely attached to the roof. You don’t want them flying off at the first breeze!
Second, ensure that all connections to the roof are (and remain) leak-free. To this end, rubber gaskets, flashing, and sealant are all used in abundance, along with good engineering practices so the installation affects the roof as little as possible.
If you’re worried about your solar installation causing roof eaks, that’s understandable! Let’s go over how to install solar panels on rooftops and what precautions installers make to ensure water never gets inside.
The Basics of How to Install Solar Panels on a Rooftop
Installers don’t just lay solar panels on the roof. If a storm comes, they’d blow off pretty quickly. Instead, solar panels are bolted onto the roof using what’s known as ‘racking’. There are different types of racking for different roofing types, but generally includes long aluminum rails that the solar panels lay on, aluminum feet that connect the rails to the roof, and most of the time a large lag bolt that anchors the aluminum foot to the roof rafter.
The building departments of most cities and towns require solar installations to withstand 100 to 120 mile per hour wind, such as the City of Broomfield, CO, which requires that installations can handle 110 mph winds. Watch out, those are hurricane forces!
This means that a solar installation needs to be fastened strongly and semi-permanently to the building. To do this, installations are anchored directly to the structure of the home, bolted directly into the roof rafters. Yes, that’s right. Bolted into your roof. It might seem extreme, but that’s what’s needed to withstand these ultra-fast winds!
Obviously, this creates a problem. You’ve bolted through the roofing into the structure of the house. Now you’ve created a place where water can leak into the house. What you do to prevent that depends on the type of roofing you have.
Composite Shingles
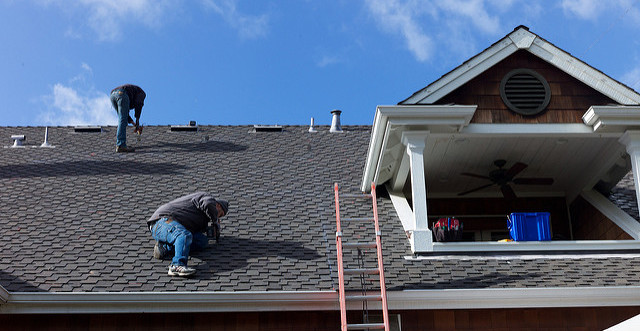
Also known as asphalt shingle or ‘comp’ shingle, composition shingles are the most prevalent roofing material in the US. As the roof is covered in hundreds of individual pieces overlapping each other up the side of the roof, comp shingle works great for fairly steep roofs, but not so great at low angles where water could stand or seep underneath individual shingles.
Comp shingle is fairly easy to install solar on. Unlike tiles that break, solar installers can freely walk over comp shingle without worry. Anchors are installed through the shingle directly into the roof rafters. To prevent any leaking, installers use several lines of defense – one on top of the other – as a fail-proof:
- Installers use rubber gaskets and washers on the lag bolt and aluminum feet as a ‘first line of defense’ against water. These rubber gaskets prevent water from entering the hole with the lag bolt.
- Next, installers place metal flashings over each hole and slide them partially up under the shingle above (similar to your existing shingles) to divert water away from the hole. Installers also place a bead of sealant –typically in the shape of a horseshoe or circle – around the hole (or penetration as they say in the solar biz) to further divert water away.
- Lastly, the lag bolt and hole is filled with waterproof sealant, creating a dry-as-bone penetration.
Tile Roofs
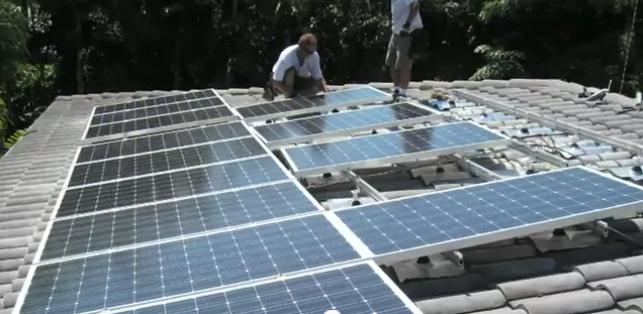
Tile roofs add flair and style to many home, but for solar installers, they present a serious challenge. Installation on tile roofs is quite similar to comp shingle, but with one key difference. Tile is fragile. And to install solar you have to walk on the roof. A lot. As you can imagine, things break. It’s pretty much a given. The homeowner either needs to have extra tile or the solar company needs to bring their own matching tile – which can be hard to find.
Beyond that annoyance, tile’s fragility presents another problem. You can’t really drill and seal a hole through tile roofs. Tile is rigid and there are gaps between the actual tiles and roof underlayment, making waterproofing even more difficult.
The solar industry though innovates quickly, and installers now can use special feet specifically for tile that slide underneath an individual tile ‘shingle’ and stick out the bottom, where it can be bolted to the aluminum rail. Where the foot connects to the roof, installers use sealant and flashing just like with comp shingles, to make it absolutely water-tight.
To really understand how the system works, check out the following video by Quick Mount, a solar racking manufacturer that manufacturers these special tile attachments.
Rolled Roof
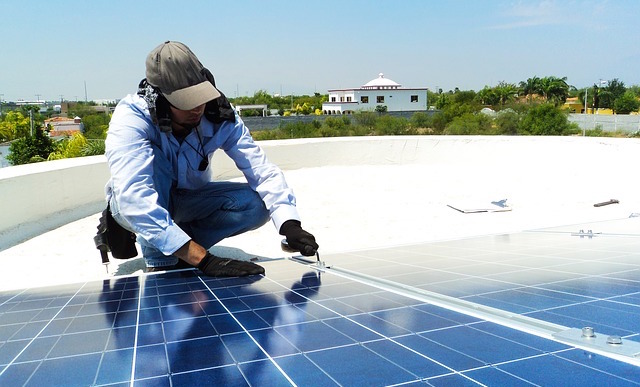
Just like tile roofs, rolled roofing also presents a special challenge to solar installers. As rolled roofing is used on flatter roofs, water doesn’t drain down the roof as easily or quickly as tile or comp shingle roofs. Therefore in these situations, solar installers need to take extra fortification against water possibly standing on the roof for longer periods of time.
Just like with comp shingle, anchors are typically bolted directly through the roofing material into the roof rafters. Flashings are also used, but instead of metal they are typically a large square of roofing material that is bonded to the roof with sticky, uber-strong roofing cement. The anchor sticks out of the middle of the square and is partially covered in roofing cement as well, thereby creating a waterproof anchor.
Standing Seam Metal Roofs
You see standing seam metal roofs on commercial buildings, barns, and occasionally homes. These roofs offer one distinct advantage over other roof types, so if you’ve got a standing seam metal roof and you’re contemplating installing solar, you’re in luck.
How the solar installation is attached to standing seam metal roofs is quite different than the roofs above. There are no penetrations into the roof. Instead of bolting into the rafters, the aluminum feet are attached directly to each seam running up the roof using a small clamp that is tightened down by the installer.
Penetrations might still need to be made for electrical conduit, but not nearly as many as with installations on comp shingle, tile, or rolled roof.
Here’s a quick look at how solar panels are installed on standing seam metal roofs:
As you can see, solar installations are designed to minimize impact on your roof and to not affect the integrity. Proper design and equipment, including flashing and sealant, create watertight seals designed to last the life of your installation. So if you’re worried about water damage to your roof, no need to fret! If you have any questions on how solar panels are installed on the roof, ask away in the comments below.