The Basics of Solar Panel Installation

What you can expect to during the solar panel installation process.
The Site Evaluation
When you’ve committed to getting a solar panel installation, the very first thing your installer will do is perform a detailed site evaluation. Solar panels are not a one-size-fits-all solution – there are many factors that needs to be taken into account when designing a solar system to make sure it meets your needs. The evaluation is intended to answer these questions:
#1 – Positioning the solar panel installation
In the majority of cases, solar panel arrays are installed onto a pre-existing roof. The position, construction, and condition of the roof will all have a significant effect on the final design and installation process of your solar system.
#2 – Finding the roof orientation
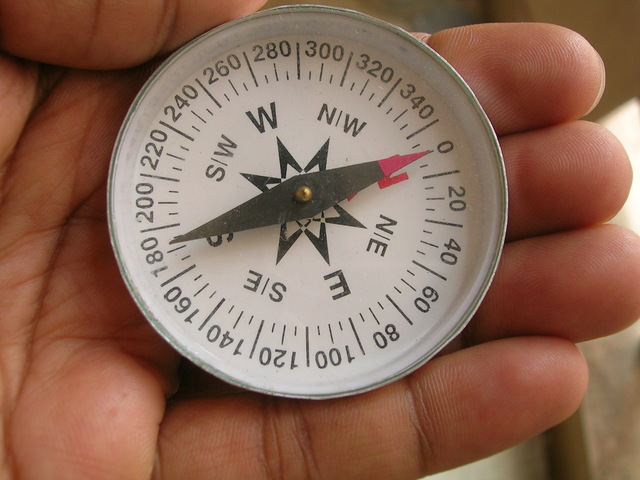
The orientation of the roof is easily found with a simple compass. Solar arrays in the Northern Hemisphere are usually oriented with reference to true south. Because there is a difference between the true poles and the magnetic poles (called “magnetic declination”) this has to be taken into account.
Magnetic declination varies significantly depending on your location in the world. If you move west across the United States, you’ll find that declination in Maine is 16° west, but 0° by the time you get to Louisiana. Once you’ve reached Texas, the declination has swung back around to 4° east. Thankfully magnetic declination is very easy to look up, with a variety of resources available.
Very few homes in the US have their roofs oriented towards true south, as they weren’t originally built with solar power in mind. That’s rarely an issue, however. As long as the roof is within 30° of true south you can still get excellent performance from a solar array.
#3 – Finding the tilt of the roof

Finding the angle of the roof itself is simple. The installer might use a dedicated inclinometer, but the angle can just as easily be found with a smartphone app taking advantage of the phone’s internal sensors. Failing that, it can usually be worked out with a measuring tape and some very simple trigonometry.
The tilt of the roof usually dictates the tilt of the solar panels, though a small amount of adjustment may be made in the rack supporting the panels. Between wind loads and aesthetic concerns, most homes in the US have a roofing angle of between 25 and 35°.
Panels at a shallower angle can catch more sunlight in the early morning and late evening, in exchange for taking in a little less during the brightest hours. Depending on a number of factors like geographical location and the season, this might net you more power overall. You might also wish to sacrifice efficiency in winter to harvest more power in the summer, in exchange for maximizing your annual energy yield.
#4 – Assessing the structure of your roof
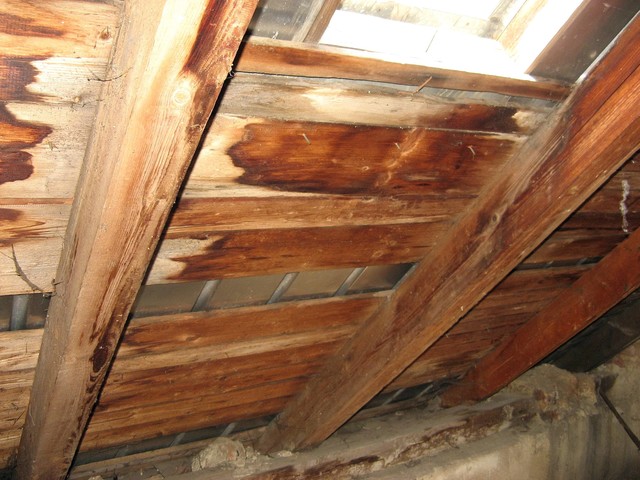
If your panels are going on your roof, expect your installer to make a very careful assessment of the roof’s structure and condition. They’ll be looking for any signs of wear or deterioration, making sure the roof is up to the task of holding your solar panels. If the roof is very old or in poor condition, your installer may recommend you get it replaced before the installation goes forward. Installing solar panels on a roof that will soon need replacement is usually inadvisable – you’ll need to deal with the extra expense of removing and reinstalling the panels.
#5 – Analyzing and adjusting your loads
Part of the site evaluation includes an analysis of the current electrical loads in your home, to determine the output needed in the final solar system. You might find this analysis reveals some easy ways to improve your property’s power efficiency, such as replacing incandescent bulbs with LED or CFL bulbs, or replacing old, power-hungry refrigerators and freezers with more modern, more efficient models.
Solar Insolation and the Solar Window
After your home has been checked over to see what needs to be done to make it suitable for solar power, it’s time to take a look at how much power is available. There are two parts to this – Solar Insolation and the Solar Window.
Solar Insolation
Solar insolation is best described as the amount of solar energy reaching the site over time. It’s affected by a few things – mostly the time of year, and the local weather and climate. Finding the solar insolation is the first step in determining the amount of power you can get from your solar panels. The rule of thumb is that at sea level on a clear day you’ll get around 1000 watts of solar energy per square meter per hour (or “one sun”).
Solar Window
The second step in determining how much power you can get is the “solar window”, and this is what will determine the ideal positioning of your solar panels. The solar window accounts for all the local sources of shade – tall trees and other geographical features, nearby buildings, and so on – as well as accounting for the path of the sun throughout the year.
Measuring the Solar Window
There are some very clever tools that can be used to determine the solar window – a very popular one is the solar pathfinder. Using a reflective dome and a chart of the sun paths throughout the year at the local latitude, it shows when you’ll get power and when the array will be in shade. You can work out from the chart exactly what percentage of the local insolation will be available to a solar panel at the spot where the reading is taken.
Expect your installer to take a number of readings in various locations around your site, from where they’ll recommend the ideal placement of your array. The actual reading for your solar array may be what’s referred to as a “four corner analysis”. This is where a reading is taken at each of the major corners of the array, and then these readings are averaged to provide you with the final figure showing how much solar energy your panels will have available to them throughout the year.
Related: Calculating the kWh your solar panels will produce.
System Design
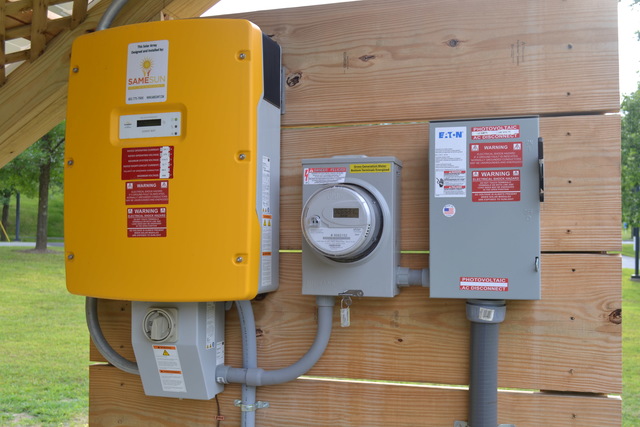
Depending on the type of system you’re installing there are quite a few ancillary components in addition to the solar panels. Beyond the obvious cables and junction boxes there will be either inverters or micro-inverters to deal with, alongside items like grounding conductors and deep-cycle batteries, depending on your needs.
For the sake of safety and reliability the system will need to be up to the standards of the wiring regulations. There are a huge number of things to take into account to satisfy the regulations – everything from the local climate to the aesthetics of the cable routing and the strength of the fixings used to mount the hardware.
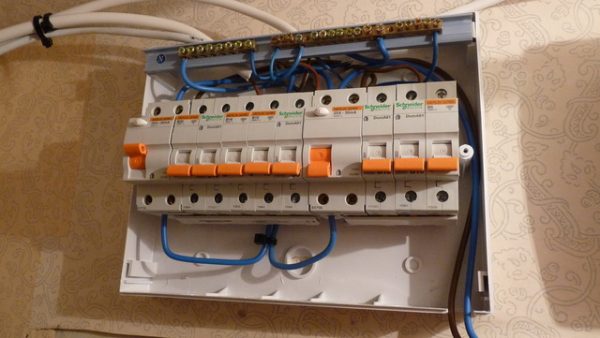
Expect the installer to do a very careful examination of your current electrical panel, where they’ll be looking at things like the ratings of the main breaker and the bus bar, make and model of the enclosure and the amount of available breaker space.
Firefighter safety switch
Something that will be of great importance is the location of the Firefighter Safety Switch. Solar panel systems can be very high voltage, and in the event of a fire the firemen need to be able to isolate the system. In many jurisdictions, if the switch isn’t present or up to code, your fire department may choose to leave the property to burn rather than risking electrocution.
Installation
The actual installation process can be completed in one or two days in most cases. In the rare event that more time is required, your installer will probably be able to predict it and warn you beforehand so you can plan accordingly.
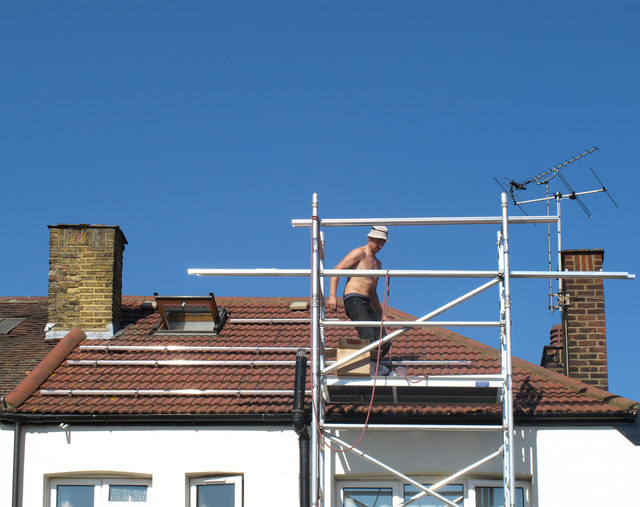
#1 – Erecting scaffolding
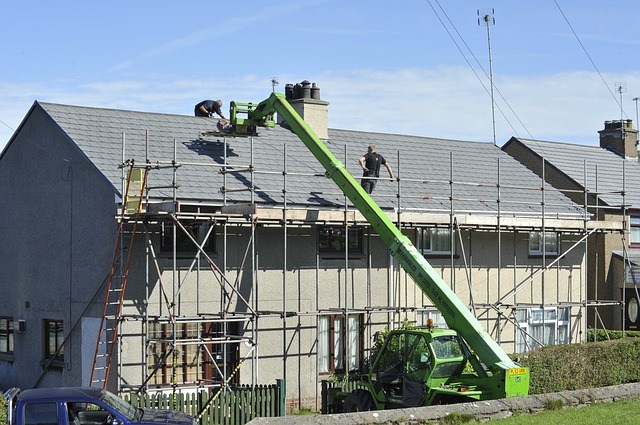
The first step in installing solar panels on your roof will probably be the erection of a scaffold. This will allow the installers safe access to the roof and create a safe working platform with guard rails to prevent any mishaps.
#2 – Installing roof anchors
Most racking systems will use some form of anchor attached to the rafters to hold the frame on the roof. If you have a slate or tiled roof, installing these will involve cutting and dressing the tiles to fit. The installers will put a lot of care into installing these anchors, as they dictate the layout of the frame.
#3 – Attaching the frame
The frame will now be attached onto the roof anchors. Frames are often constructed of simple aluminum rails running across the anchors, which the solar panels then bolt to. A great deal of care will be taken to ensure the frame sits straight, level and parallel. If there’s any deviation in the installation of the frame, the solar panels it holds won’t sit straight, and even if everything works it isn’t going to look good! There’s usually some level of tolerance built into the system to help account for this – no roof is perfectly even or square.
#4 – Installing the solar panels
The solar panels themselves are now placed onto the frame. This may be done by row or column – it depends on the model of panel and possibly the mood of the installer.
#5 – Wiring everything together
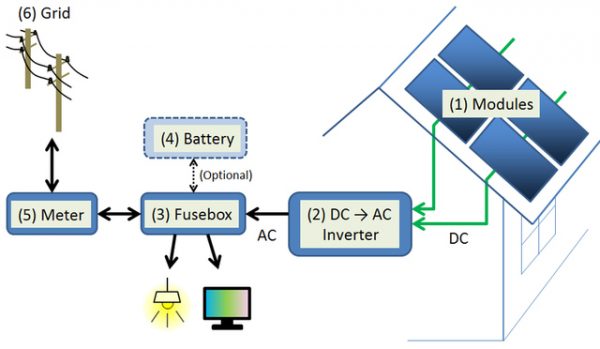
The panels are wired together according to the needs of the system – if you’re using a single inverter this will be in several equal strings. With a micro-inverter based system, the panels will all be wired together in parallel. The cables will by routed to your electrical box. The installers will work with care whilst handling these wires – as soon as the panels are receiving sunlight, they’re generating current. If you have them, the inverter, charge controller and batteries will be hooked together at this point, and everything will then be hooked up to your breakers.
#6 – Commissioning the system
Depending on your local jurisdiction, it’s likely that your system will need to be inspected, tested and certified before you can start using it. In some areas the installer can do this – in others, it will need to be independently verified.
As soon as it is signed off, you can start reaping the benefits of your new solar system!
Conclusion
Although there’s a lot involved in getting a solar system installed, the actual process is fairly straightforward. Working with an experienced installer, you should find everything comes together smoothly.
If you have had a solar system installed, I’d love to hear about your experiences in the comments below.
Image Credits:
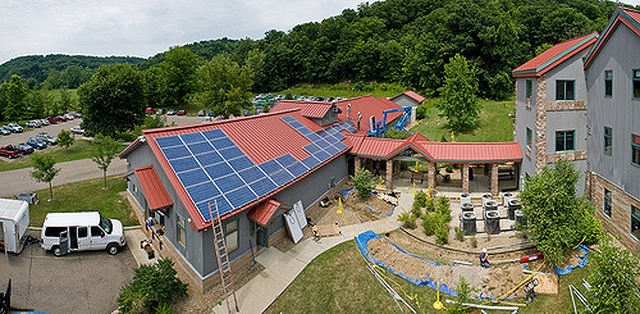
Solar Installation at Wayne National Forest – Alex Snyder @ flickr
Support Frame – David Hawgood @ geograph.org.uk
Wiring Diagram – By S-kei (Own work) [CC0], via Wikimedia Commons
Other pictures from Pixabay, Pexels, Wikimedia Commons, Pixnio