How to: Solar Panel Snow Removal

A ‘How to’ guide on Solar Panel Snow Removal
Trying to find ways around that pesky snow that’s jamming up your solar production?
Don’t worry, you are not alone in your search for the best solution to solar panel snow removal. Thousands of solar homeowners from snowy states are trying to find the answer to that same issue. From special rakes to throwing balls at their snow-covered panels, people have tried it all.
How, or if, you clean you solar panels largely depends on your roof. If it’s easy to access from the ground, maybe all you need is a snow rake. If your panels are mounted all over your roof or your roof is very high, you might have to look into other methods.
We provide a handful of methods below, so you can pick what method best suits your needs.
Should I Remove the Snow Myself?
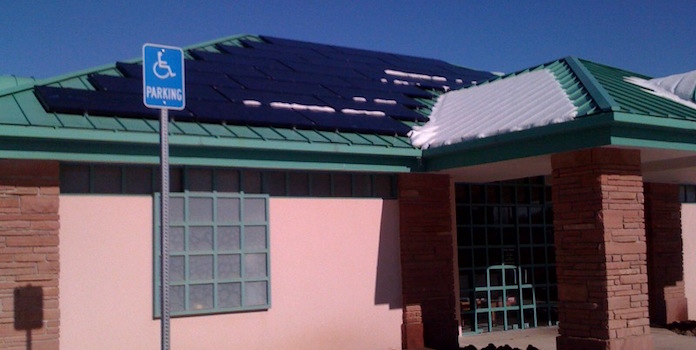
For the most part, gravity and the sun take care of snow removal. After a heavy snow, the sun comes out and starts to warm everything up, including your solar panels. Solar panels are designed to shed snow. The deep black and blue colors help the panels absorb the sunlight’s heat – melting the snow – and the extremely-slippery tempered glass encourages the snow to slide off.
If you live in an area where the sun comes out shortly after a snowstorm – like Colorado for instance – it might be enough to simply let nature run its course. In a few days, your panels will be clean again and producing that clean electricity!
When solar companies estimate your installation’s energy production, they always take weather into account, so loss of production from snow has already been accounted for. Removing snow from your panels isn’t going to make a huge difference in your total electricity production each year and by far the easiest and safest way to remove snow is to just wait and let the sun and your panels do their thing.
But if you don’t want to just sit around and let things happen naturally, below are a few options to speed up the process.
Sweeping with a Broom
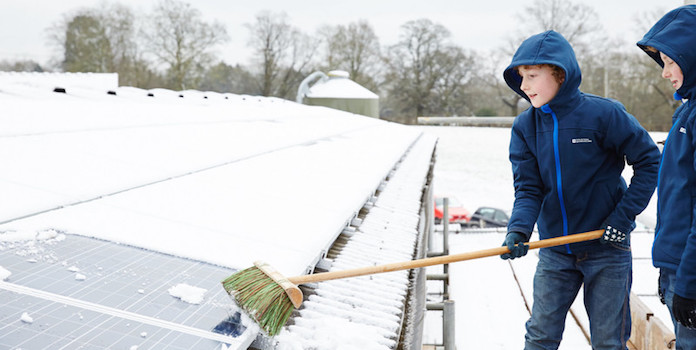
Ascending to the roof and sweeping off your snowy panels with a broom doesn’t require any special equipment and is probably the most cost-effective option for homeowners (as long as you have a broom and ladder).
This method obviously poses some serious safety issues. Getting up on your roof is scary enough when it’s dry. When it’s covered in snow, or when placing a ladder on snowy ground, it can be downright dangerous! If you have a single large group of panels on your roof, you’re going to have a very hard time cleaning off the panels in the very middle.
The best way to remove snow from solar panels is simply with a snow removal rake.
Purchase a Solar Panel Snow Removal Rake
The easiest, safest option for most homeowners, are solar panel snow rakes. These feature a soft, rubbery rake attached to a long telescoping pole that helps you easily access roof-top panels safely from the ground. The soft head allows you to quickly clear snow off your solar panels without worrying about scratching or damaging the surface.
The best known solar panel snow rake is the Snow-Pro. You can buy the head alone for $25 or the head and telescoping pole from $65 to $150 depending on the length of the pole. Here’s a quick video showing the Snow-Pro in action easily cleaning off about a foot of snow from roof-mounted solar panels!
As you can probably surmise, the snow rake is great if your solar panels are easy to reach from the ground. If you have a very high roof or your solar panels are installed in difficult-to-reach areas, the snow rake isn’t going to do you much good. If this is the case for you, you might need to reach out to professionals.
Hire a Professional
If you have a roof that is too high for a solar panel roof rake and too steep or dangerous to climb up yourself, it’s probably time to hire a professional. Many snow removal companies offer roof snow removal, so call around to see what their rates are. In addition, in the last 5 to 10 years, more and more solar panel cleaning companies are popping up across the country. These companies visit your home regularly to clean off snow, dust, bird droppings, and all the other junk that can decrease your production.
Before hiring a professional cleaning service, be sure to do a quick cost analysis to make sure it’s actually in your best financial interest. If you are spending more money cleaning the panels than the additional production is saving you, you need to check out some cheaper options!
DIY Methods
We can’t really recommend this technique.
Many DIY methods can be found out there on the internet. Some are fairly benign and even comical, like throwing soft Nerf balls on the panels in an attempt to bounce some snow off (not sure we can recommend this). Others are a bit more detrimental (and even corrosive), like placing a sock-like bag of ice melt on the roof above your panels to create a clear path for melting snow. If you want to experiment, be sure it won’t damage the solar panels, the wiring underneath, the mounting hardware, or your roof. It could melt the snow, but at what cost? Your snow might melt a little faster, but spending thousands of dollars to replace corroded equipment or roofing isn’t worth it!
Minimize the Snow’s Effect
As they say, ‘the best defense is a good offense’. If you live in a snow-prone area, here are a couple best practices to minimize the snow’s effect on your production.
Install Panels on a South Facing Roof
Installing your solar panels on a south facing roof not only ensures you’ll see the best energy production, as the panels face directly towards the sun, but snow will also melt faster. Even though the panels will be covered with snow, the dark black and blue will absorb the heat from the sunlight and encourage the snow to melt faster than if your panels were installed on an east- or west-facing roof.
Install Panels on a Tilted Roof
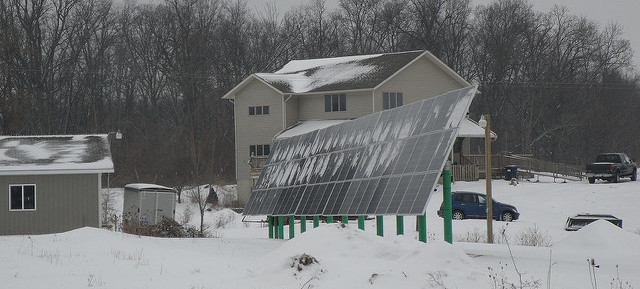
As mentioned, solar panel glass is quite slippery, so greater tilt means that snow will slide off easier. Anything 30 degrees or steeper should be good to go and snow will readily slide off soon after the sun comes out.
If you have a flatter roof (15 to 20 degrees), think about installing a tilt kit, which allows you to install panels at an angle that is steeper than the roof. Your snow will melt faster than otherwise and you’ll see higher energy production throughout the year as well.
Installing solar panels that aren’t flush against the roof though can be somewhat garish and unsightly. In fact, HOAs in many states have rules that panels must be flush against the roof, so adding a tilt kit is really only an option for homeowners with roofs that are somewhat hidden or that don’t mind an ungainly look to their installation.
Avoid Shading
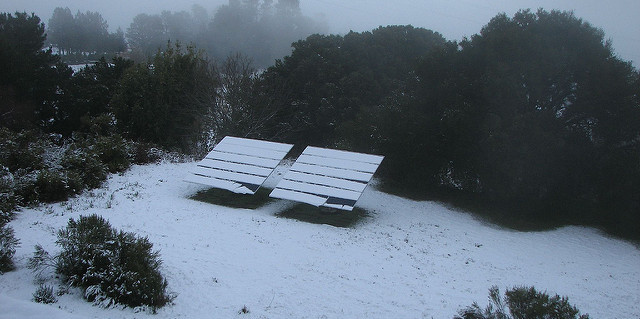 Installed well clear of trees
This is a basic tenant of solar design, but remember to not install panels where they’ll be shaded during the winter months (or summer months for that matter). In the wintertime, evergreen trees, satellite dishes, chimneys, and neighboring buildings can all block sunlight, decreasing production and causing the snow to melt more slowly. Be sure to plan your installation with all sources of shade taken into account!
Install microinverters
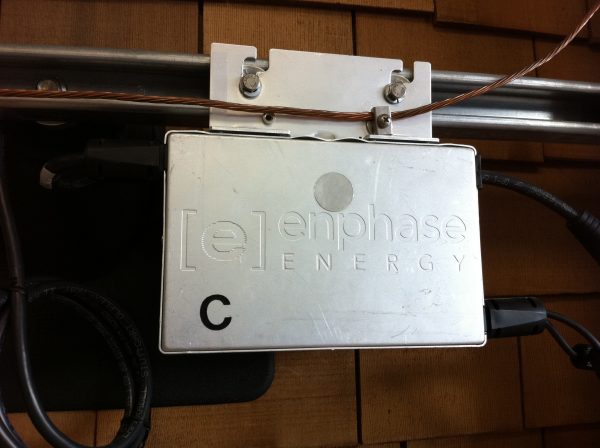
If you’ve noticed that snow on certain sections of your roof is slower to melt, you could consider installing microinverters. Microinverters optimize each solar panel individually, so even if some solar panels are covered in snow, others will still pump out electricity.
With the standard string inverter that most homeowners have, if just a handful of their panels are covered in snow (or shaded in any other way), the entire solar installation’s production decreases drastically, even if there are several panels that are snow-free! Microinverters are more expensive than string inverters, so analyze your additional costs against how much electricity you would lose due to snow cover.
Disclaimer: This content is provided for entertainment purposes only and should not be construed as advice. Always consult a professional before doing anything dangerous.
Images under CC License from Flickr: 1, 2, 3, 4, 5 & from Wikimedia: 6